Have you ever wanted to restore your database's state to a particular moment in time? This post explains how, using WAL-G.
Introduction
WAL-G is an open-source continuous archiving tool used to easily set up and recover from physical backups in Postgres. It mainly handles the storage and retrieval of physical backups and WAL archives to and from a chosen cloud storage provider. In this post, we will walk you through on how to effortlessly set up WAL-G for your database as well as guide you on what to do if and when disaster strikes.
Prerequisites
For this tutorial, we will be using two instances running Postgres databases on Ubuntu 18.04. One instance will act as your main database, the other is your recovery database. If you’re using another operating system some file paths may vary.
Installations
Make sure the below packages are installed in your instances. Alternatively, you can spin up the latest version of Supabase Postgres which would already have everything configured and installed, along with other goodies. It is readily available in either the AWS or Digital Ocean marketplaces and only takes a few minutes to get running.
Postgres 12
A quick installation guide can be found here.
envdir
envdir allows us to run other programs with a modified environment based on the files in the provided directory. This can be installed through the daemontools package:
_10$ sudo apt-get install -y daemontools
WAL-G
_10$ wget https://github.com/wal-g/wal-g/releases/download/v0.2.15/wal-g.linux-amd64.tar.gz_10$ tar -zxvf wal-g.linux-amd64.tar.gz_10$ mv wal-g /usr/local/bin/
AWS credentials and resources
When storing backups, WAL-G has numerous cloud storage provider options for us to choose from. For this tutorial, we will be using AWS. Have the following prepared:
- AWS Access & Secret keys.
- An S3 bucket.
Setting it up
1. Configure environment variables
The directory /etc/wal-g.d/env is created and contains files that stores environment variables. It would later be used in WAL-G commands via envdir.
_10$ umask u=rwx,g=rx,o=_10$ mkdir -p /etc/wal-g.d/env_10$ echo 'secret-key-content' > /etc/wal-g.d/env/AWS_SECRET_ACCESS_KEY_10$ echo 'access-key' > /etc/wal-g.d/env/AWS_ACCESS_KEY_ID_10$ echo 's3://backup-bucket/project-directory' > /etc/wal-g.d/env/WALG_S3_PREFIX_10$ echo 'db password' > /etc/wal-g.d/env/PGPASSWORD_10$ chown -R root:postgres /etc/wal-g.d
2. Enable WAL archiving
Here, we enable WAL archiving and instruct Postgres to store the archives in the specified S3 bucket via WAL-G.
_10$ echo "archive_mode = yes" >> /etc/postgresql/12/main/postgresql.conf_10$ echo "archive_command = 'envdir /etc/wal-g.d/env /usr/local/bin/wal-g wal-push %p'" >> /etc/postgresql/12/main/postgresql.conf_10$ echo "archive_timeout = 60" >> /etc/postgresql/12/main/postgresql.conf
3. Restart the database
The database is restarted to let the changes in the configuration to take effect.
_10$ sudo /etc/init.d/postgresql restart
4. Create your first physical backup
_10$ sudo -su postgres envdir /etc/wal-g.d/env /usr/local/bin/wal-g backup-push /var/lib/postgresql/12/main
At this point, if you were to check the S3 path that you provided, the following two newly created and populated directories would be observed:
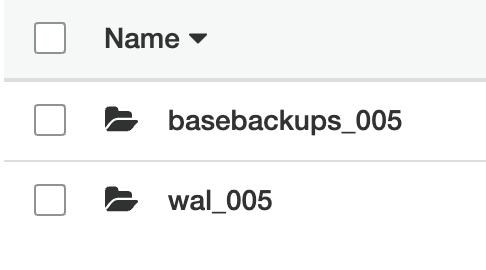
From then on, subsequent physical backups would be found in the directory basebackups_005 and any WAL archives would be sent to the directory wal_005.
5. [Optional] Schedule regular physical backups
A CRON job can then be set to schedule physical backups to be performed everyday:
_10$ echo "0 0 * * * postgres /usr/bin/envdir /etc/wal-g.d/env /usr/local/bin/wal-g backup-push /var/lib/postgresql/12/main" > /etc/cron.d/pg_backup
Here, the instance has been instructed to back up the database at the start of each day at midnight. By physically backing up your instance regularly, overall recovery time could be faster. Restoring from a physical backup from yesterday would lead to fewer WAL archive files to be replayed as compared to restoring from one from a month ago.
Disaster strikes
Something goes wrong with the database or instance. We will now use what available physical backups we have in the S3 bucket to recover and restore all of our data on to a new instance.
1. Configure environment variables
The configuration should be the same as the original instance. For recovery and restoration, we would not need the variable PGPASSWORD.
_10$ umask u=rwx,g=rx,o=_10$ mkdir -p /etc/wal-g.d/env_10$ echo 'secret-key-content' > /etc/wal-g.d/env/AWS_SECRET_ACCESS_KEY_10$ echo 'access-key' > /etc/wal-g.d/env/AWS_ACCESS_KEY_ID_10$ echo 's3://backup-bucket/project-directory' > /etc/wal-g.d/env/WALG_S3_PREFIX_10$ chown -R root:postgres /etc/wal-g.d
2. Stop the database
_10$ sudo /etc/init.d/postgresql stop
3. Switch to the user postgres
_10$ sudo -su postgres
4. Prepare the database for recovery
Set restore_command
Through restore_command, we instruct Postgres to pull all WAL archives from our S3 bucket to use during recovery.
_10$ echo "restore_command = '/usr/bin/envdir /etc/wal-g.d/env /usr/local/bin/wal-g wal-fetch \"%f\" \"%p\" >> /tmp/wal.log 2>&1'" >> /etc/postgresql/12/main/postgresql.conf
[Optional] Achieve Point in Time Recovery (PITR)
If we want to restore the database only up to a certain point in time (eg. right before the disaster), we can do so by setting both recovery_target_time and recovery_target_action. Do note that the timezone would need to match that of the original instance. This is usually at the UTC (+00) timezone.
_10$ echo "recovery_target_time = '2020-07-27 01:23:00.000000+00'" >> /etc/postgresql/12/main/postgresql.conf_10$ echo "recovery_target_action = 'promote'" >> /etc/postgresql/12/main/postgresql.conf
5. Restore from physical backup
The current data directory is deleted and is replaced with the latest version of the physical backup from the S3 bucket.
_10$ rm -rf /var/lib/postgresql/12/main_10$ envdir /etc/wal-g.d/env /usr/local/bin/wal-g backup-fetch /var/lib/postgresql/12/main LATEST
6. Create a recovery.signal file
This file instructs Postgres that the database should undergo recovery mode upon start.
_10$ touch /var/lib/postgresql/12/main/recovery.signal
7. Log out of postgres and start the database
_10$ exit_10$ sudo /etc/init.d/postgresql start
Once Postgres finishes starting up and completes recovery mode, all data or data up to the specified point in time would have been successfully restored on to the new instance. Disaster averted.